Database
SØAD Online IDE provides a built-in Database module that allows developers to manage database schema and interact with data directly within the IDE—without needing external tools or installations.
This module is useful for inspecting tables, writing SQL queries, and performing schema modifications in real-time while building your SØAD application.
List of Tables
To display the list of tables, select the Database menu from the main navigation in the SØAD Online IDE. This opens the schema browser, where all tables in the current database are listed.
A search bar at the top of the panel allows you to quickly locate a specific table by name. Just type part of the table name, and matching results will appear instantly—making navigation efficient even in large schemas.
The Action button next to a table type provides several management options, including:
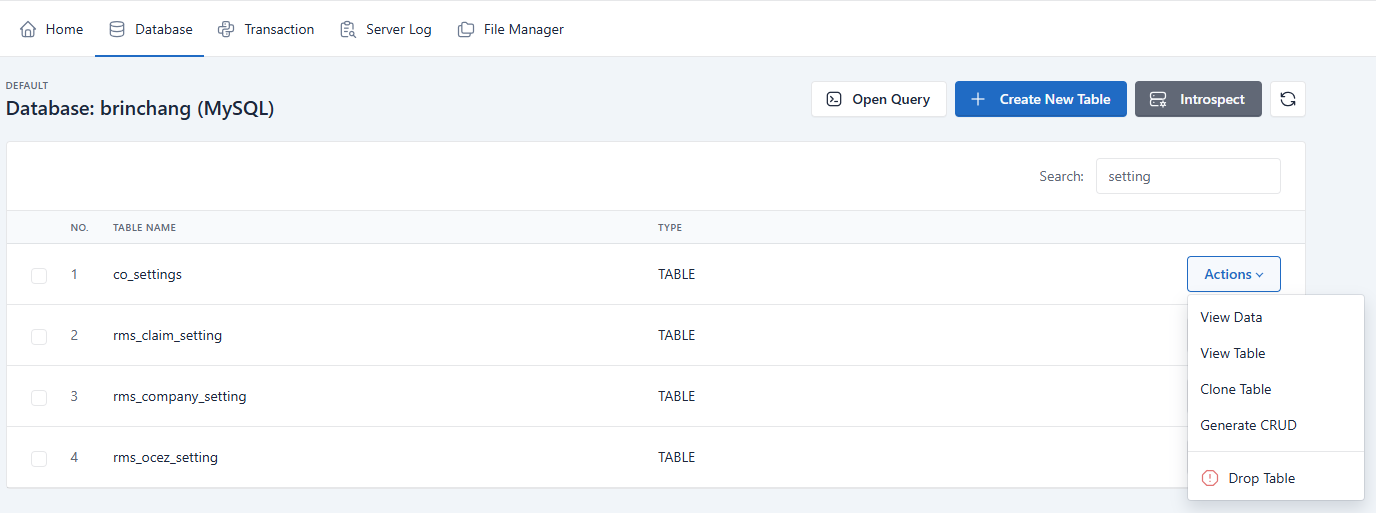
- View Data - Display the records stored in the selected table.
- View Table - Show the table structure, including columns and data types.
- Clone Table - Create a duplicate of the selected table.
- Generate CRUD - Automatically generate Create, Read, Update, and Delete operations for the table.
- Drop Table - Permanently delete the table from the database.
Create New Table
To create a new table, click on the Create New Table button located at the top right of the screen. This opens a modal window where you can define the table structure.
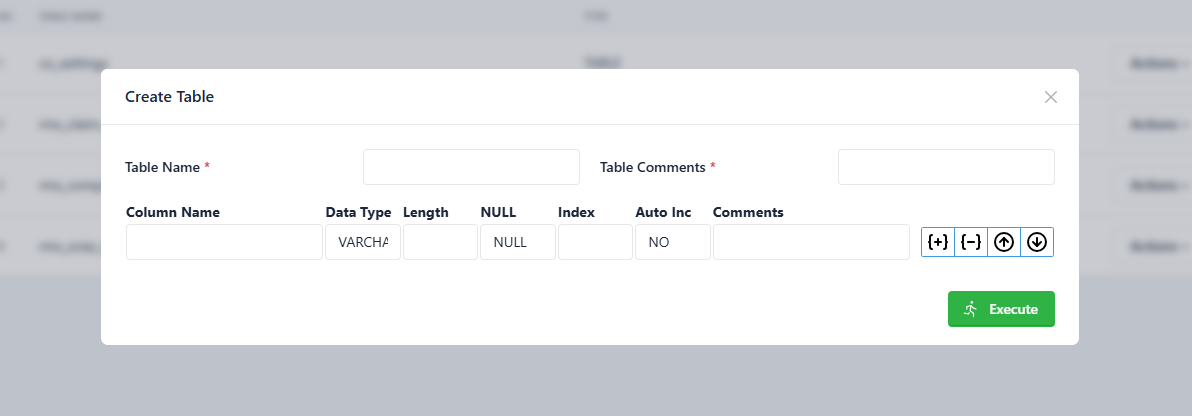
| Field | Description | Example |
|---|---|---|
| Table Name | Name of the table (max 64 characters) | hr_employee |
| Table Comments | Useful description for table | Employee Personal Record |
| Column Name | Column Name (max 64 characters) | staff_no |
| Data Type | Data Type (Refer below) | VARCHAR |
| Length | Length of data in integer (only applicable to type VARCHAR and DECIMAL) | 20 |
| NULL | Column can accept NULL value or not | NOT NULL |
| Index | Column is either PRIMARY (primary key), UNIQUE (unique index), INDEX (normal index) or NONE (normal column) | |
| Auto Inc | Column is auto increment or not (only applicable to type NUMBER and key PRIMARY) | |
| Comment | Useful description of column | Staff No |
-
To add more columns, click the {+} button.
-
To delete a column, click the {-} button.
-
To move a column to the top, click the {arrow up} button.
-
To move a column to the bottom, click the {arrow down} button.
Supported Data Types
The following data types are available:
VARCHARTEXTMEDIUMTEXTINTBIGINTBITDECIMALDATEDATETIMETIMEBLOBMEDIUMBLOB
SØAD Conventions
SØAD has a special treatment for handling BLOB (Binary Large Object) data types, which are used to store large binary files such as images or documents. When creating a BLOB column, SØAD automatically generates three related columns:
- Column to store the binary data (BLOB)
- Column to store the file name (VARCHAR)
- Column to store the file type (VARCHAR)
This convention simplifies file handling in the application, allowing you to easily manage file uploads and retrievals. For example, if you create a column named resume, SØAD will automatically create three columns: resume, resume_fn (for file name), and resume_ft (for file type).
Best Practice
Use prefix for table name for easy maintenance. Normally the group name is a good candidate for prefix name e.g. prefix HR Group's table with hr_.
SØAD Convention
Every table must have a primary key column named id. A model class representing the table will be generated with class name same with table name (ORM) e.g. table person will have a correspondent class Person. Refer to the Data Type Mapping section below for details on how MySQL data types are mapped to Java types.
Data Type Mapping
Below is a reference table mapping common MySQL data types to the Java types used in SØAD:
| MySQL Data Type | Java Type |
|---|---|
| VARCHAR | String |
| TEXT | String |
| MEDIUMTEXT | String |
| INT | Integer |
| BIGINT | java.math.BigInteger |
| BIT | Boolean |
| DECIMAL | java.math.BigDecimal |
| DATE | java.sql.Date |
| DATETIME | java.time.LocalDateTime |
| TIME | java.sql.Time |
| BLOB | byte[] |
| MEDIUMBLOB | byte[] |
Alter Table
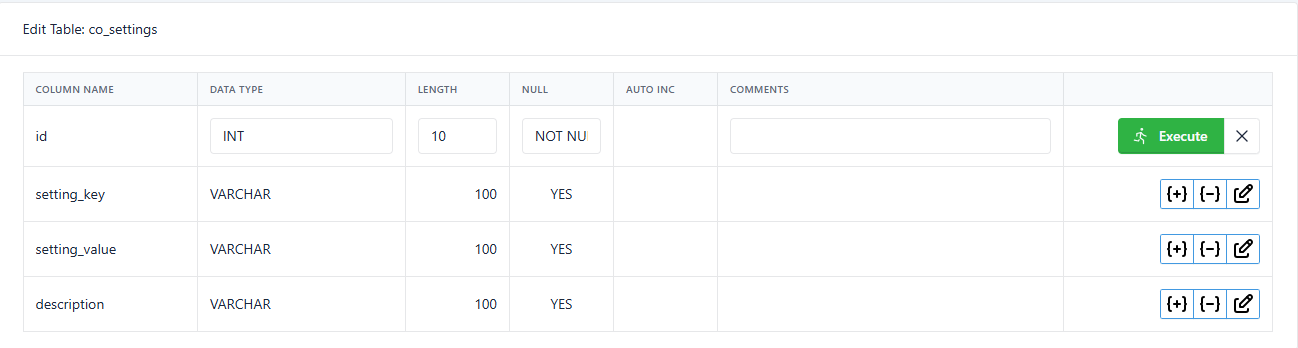
To edit an existing table, click on the View Table link and click Edit Table button at the bottom. The table structure will be displayed, allowing modifications to the table structure.
-
To add a new column, click the {+} symbol.
-
To delete an unnecessary column, click the {-} symbol.
-
To modify a column, click the pencil icon. This allows editing of the data type, length, nullability, and comments.
After making the necessary changes, click Execute on the right side of the table to apply the modifications.
Clone Table
To clone a table, click on the Clone Table link as below:
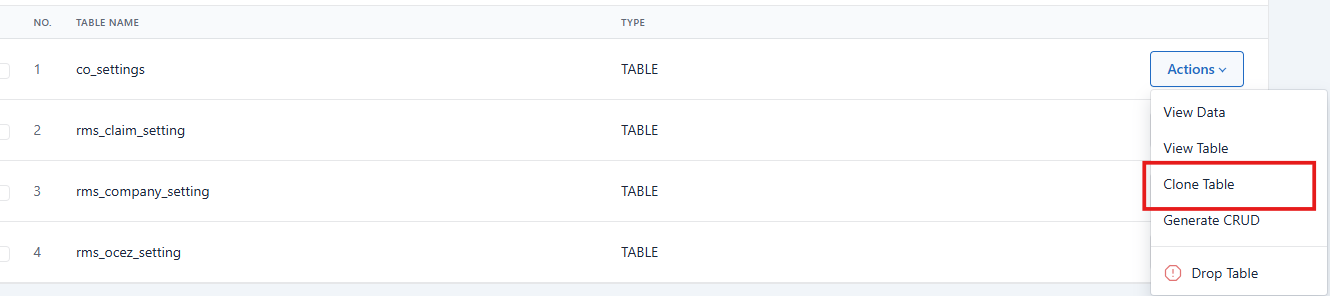
The Clone Table feature allows users to duplicate an existing table along with its structure and data. This is useful for creating backups, testing modifications, or setting up similar tables without manually recreating them.
When cloning a table, the system will generate a new table with the same columns, data types, and constraints as the original table. Users can modify the cloned table as needed after creation.
Generate CRUD
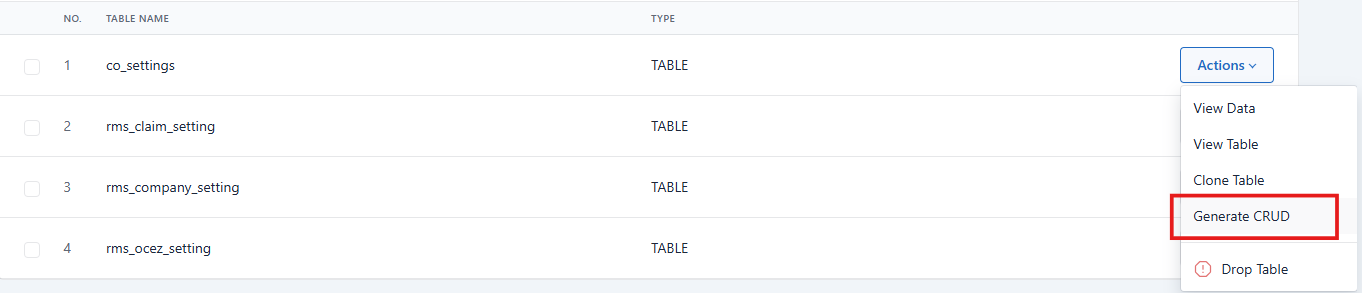
To Generate CRUD functions, click on the Generate CRUD link as below:
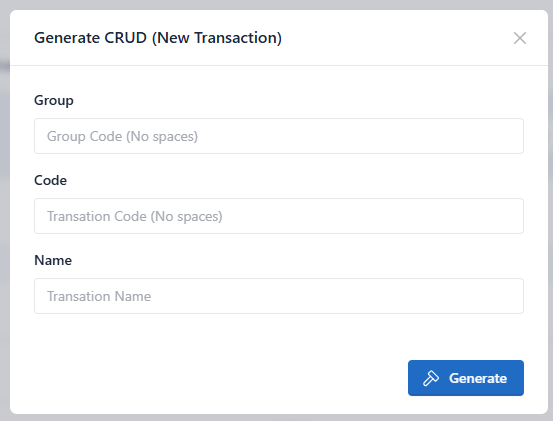
After filling in the Group, Code, and Name, it will generate a new Transaction with listing, create, update, and delete operations for the table. This feature automates the creation of basic CRUD (Create, Read, Update, Delete) operations for the selected table.
Drop Table
To drop a table, click on the Drop Table link as below:
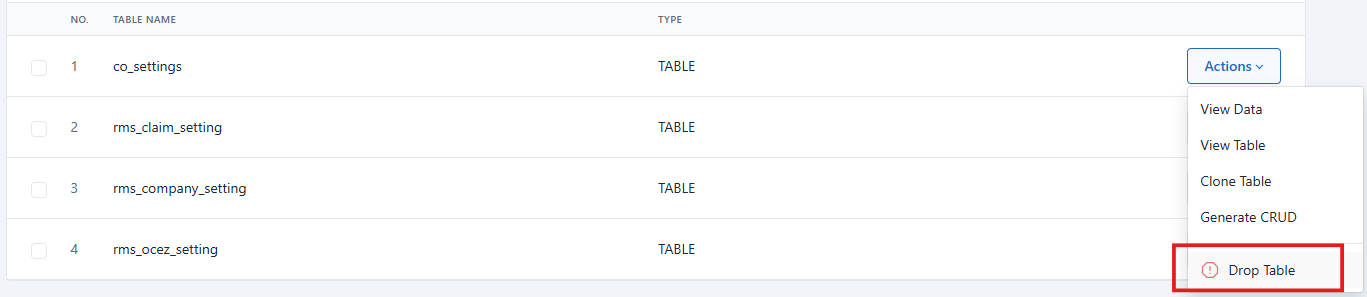
Before dropping a table, ensure it is no longer needed, as this action cannot be undone. Use this feature with caution to avoid accidental data loss.
Introspect
Click on the Introspect link as below to trigger introspection process:

The Introspect feature in SØAD automatically generates Java classes from database tables by reading the table structure. This process runs automatically and ensures that the generated files reflect the latest database scheme.
However, if any modifications are made directly to the database outside of SØAD, it will not detect these changes. Therefore, manual introspection is necessary to synchronize the system with the updated table structure, similar to restarting a server.
Open Query
Open Query function allows users to interact with the database by retrieving, adding, updating, or deleting data.
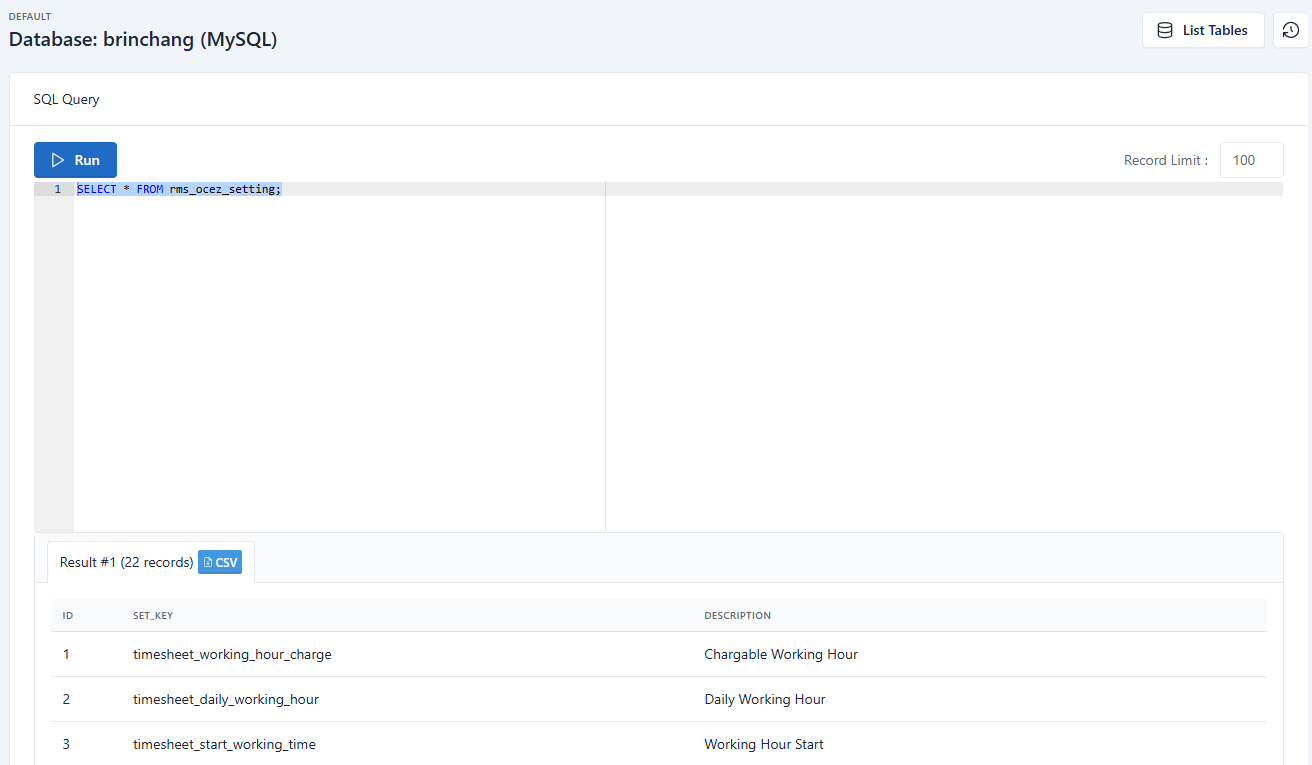
To open the SQL query editor, click on the Open Query button located at the top right of the Database module. This opens a text area where you can write and execute SQL queries directly against your database.
Common SQL Operations Supported
1. Retrieving Data - Use the SELECT statement to fetch record form the table.
2. Inserting Data - Use the INSERT INTO statement to add new records.
3. Updating Data - Modify existing records using the UPDATE statement.
4. Deleting Data - Remove specific records using the DELETE statement.
By selecting and executing a query, users can see the results displayed in the table at the bottom of the screen.